In my never ending quest to figure out cool, simple projects to do with little money I came up with this tutorial after one of my many visits to fabric store (it feels like I am always there!!). I am a little obssessed with looking though the remnants bin- they are cheap and often I find fabric I could never afford in large quantities to use in smaller projects! This week I discovered that it seems this time of of year EVERYONE is buying fleece- I am assuming that winter fleece projects are popular right now? After digging through a huge pile of fleece remnants I found 3 great colors- 1-2 yard at $1.50-2.00 each...what a DEAL!!! I decided right there that I wanted to figure out how to make a hat out of the fleece that I could wear but would also be a great gift idea for all of you out there in blog land!! So here we go!
While I don't consider myself to be a really girly girl (I wear motercycle boots and black almost every day!) I do love a vintage spin and a little "throw back style" in my wardrobe (one of my favorite books of all time happens to be Anne of Green Gables!). So I decided I wanted a warm girly hat with a big flower that felt a little vintage.
Please note that I don't like patterns- they give me anxiety- so I came up with my own way to create this hat without using a pattern -I am sure there are lots of patterns and maybe even easier ways to make a hat but this worked for my simple brain :)
Start with fleece- I decided I wanted three different colors and I wanted a really pretty color- grey, plum and black combo (color is EVERYTHING!)
Measure your head by wrapping the fleece around your head and mark.
Cut a strip of fleece to size.
Keep in mind that this strip will be the main part of the hat so the taller you want your hat- the wider this strip will be.

Cut another strip of fleece in a contrasting color- this is option- but I wanted the look of band around my hat.
 Fold the strip in half and sew down to the bottom of the wide strip of fleece making sure to sew only at the bottom of the band- this will force it to stick out a little on top and have a little depth to it.
Once the band is sewn on- turn everything inside out and sew the ends together.
At this point it should look like a hat without a top :)
Now it is time to make the top of the hat- You could have fun making the top a different color or use the same color as the bottom of the hat.
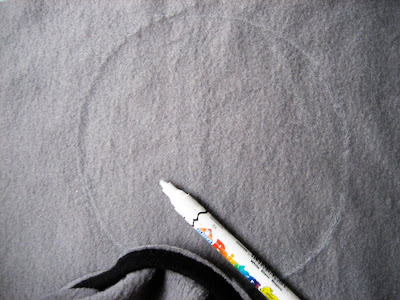
Trace the outside of the hat.
Note- before sewing it down make sure the two pieces fit together you may have to trim a little excess off the edges to get a clean fit. It also helps to pin the two pieces together and then sew the top to the bottom.
Sew together- I chose to let the stitches show because the black stitching compliments the black band (and I just love the look of stitching!!)
To make a flower- use a bright and colorful piece of fleece.
Cut out circles and stack on top.
The more circles the bulkier the flowers will be.
I used four layers.
Sew the layers together with a pretty button in the middle.
Attach to the hat.
I had quite a bit of leftover fleece so I whipped up a quick scarf that is made from the leftover squares and then stitched on the outside.


Komentar
Posting Komentar